Applies to
- Enterprise
Capabilities
Who can use this capability
System Admins with an IT Administratorcan set up SAML 2 for SSO with Smartsheet
Set up SAML 2 for single sign-on to Smartsheet
When you set up a SAML-based SSO with Smartsheet
You’ll need to do the following:
- Set up your organization’s Identity Provider (IdP) to communicate with Smartsheet.
- Add a record to your organization’s Domain Name System (DNS).
- You may need to loop in an internal technical resource for assistance with setup and maintenance of this feature.
To successfully set up SAML 2 SSO with Smartsheet for the US government,there are some requirements and settings you must apply.
Keep these things in mind
- Smartsheet supportsService-Provider-initiated SSO. If you’re configuring an IdP-initiated SSO, work with your IdP.
- You can use more than one SSO IdP at the same time.
What you need to set up Smartsheet with your IdP
- US customers, use this Smartsheet metadata:m.santa-greenland.com/sites/default/files/smartsheet-saml2-sp-metadata.xml
- EU customers, use this Smartsheet metadata:m.santa-greenland.com/sites/default/files/smartsheet-saml2-sp-metadata-eu.xml
Using the metadata provided, configure a Relying Party within your IdP. The process for configuring a Relying Party may vary for every IdP. Consult your IdP’s documentation for more information.
由于其安全漏洞,SHA1 certificate algorithm has been deprecated. You must ensure you’re not using an SSL certificate which is signed using SHA1.
SAML exchange process
Smartsheet requires the following attributes in the SAML exchange process:
- Persistent ID:urn:oasis:names:tc:SAML:2.0:nameid-format:persistent
- Email address:http://schemas.xmlsoap.org/ws/2005/05/identity/claims/emailaddress
Keep these things in mind
- The first assertion must have aPersistent IDthat’s the same for each person whenever they sign in. Your email address can be aPersistent ID, but theEmail addressclaim still needs to be passed in the assertion process. For a sample assertion and a complete list of Smartsheet’s supported claim formats, see theSAML Assertion: Supported Claims Examples in Smartsheetarticle.
- ThePersistent IDcan be defined in theNameID (subject)element of the assertion.
- If the assertion doesn't have aNameID (subject)element, you can use one of the attributes defined in theSupported Claimsarticle.
- Please ensure you remove the attribute claimhttp://schemas.xmlsoap.org/ws/2005/05/identity/claims/Namefrom the prepoulated attributes in Azure.
The following attributes are recommended but optional:
- Given Name:http://schemas.xmlsoap.org/ws/2005/05/identity/claims/givenname
- This represents the user's first name.
- Surname:http://schemas.xmlsoap.org/ws/2005/05/identity/claims/surname
- This represents the user's last name.
Some SAML services may ask for additional information when you configure them with Smartsheet:
- Assertion Consumer Service (ACS) URL: https://sso.smartsheet.com/Shibboleth.sso/SAML2/POST
On EU accounts, usehttps://sso.smartsheet.eu/Shibboleth.sso/SAML2/POST - Audience Restriction: https://sso.smartsheet.com/saml
On EU accounts, usehttps://sso.smartsheet.eu/saml
Enter email addresses in lowercase. Capital letters can prevent matching of emails between your SAML provider and Smartsheet.
Configure Smartsheet.com for use with your SAML IdP
Before proceeding, ensure you meet the requirements to configure SAML-based SSO for your account.
Open the SAML Administration form
Here’s how to establish a connection between your IdP and Smartsheet:
- On the leftNavigation Bar, selectAccount.
- In theAccountmenu, selectPlan & Billing Info.
- In theAccount Administrationform, selectSecurity Controls.
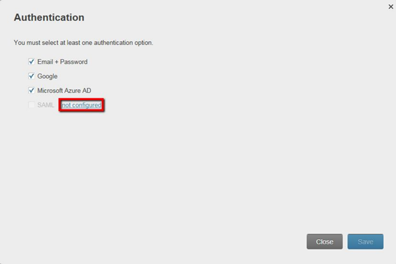
- In theAuthenticationsection, selectEdit.
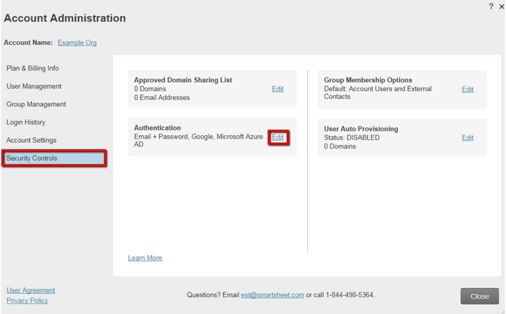
- Selectnot configured.


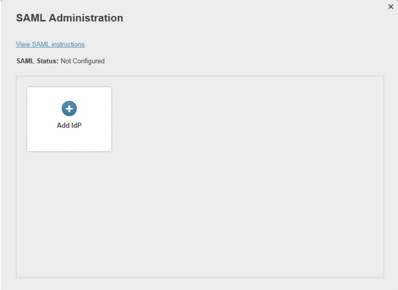
After doing these steps, theSAML Administrationform will appear.
Configure SSO with your IdP
Follow these steps to configure SAML with one or more IdPs:
- SelectAdd IdP.
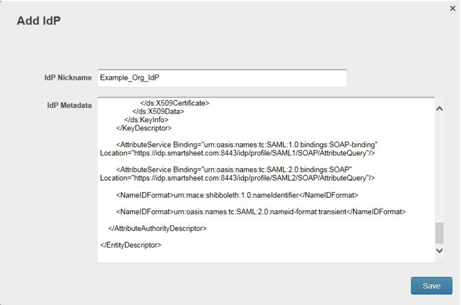
- Enter a nickname for your IdP.
- Obtain the IdP metadata; then, copy it.
Consult your IdP’s documentation to determine how to obtain the IdP metadata. - In theIdP Metadatatext box, paste theIdP Metadata.
- Copy the SSO URL; then, paste it in your IdP.
- SelectSave.
- After saving the changes you made, Smartsheet will validate the metadata.
If the validation is successful, the Edit IdP form appears. If you receive an error, check out ourSAML Frequently Asked Questions and Common Errorsarticle.
You can add a CNAME that’ll direct people to a friendly URL when they sign in. See theDirect people to sign in at a friendly CNAME URLsection below for more information.
- After saving the changes you made, Smartsheet will validate the metadata.
- To enable the IdP for use with Smartsheet, selectActivate. The IdP status will change fromInactivetoActive,Default.
- To enable SAML for your organization, in theAuthenticationform, selectSAML.
There must be at least one active IdP prior to enabling SAML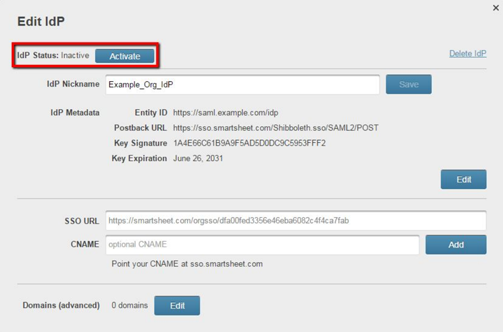
- SelectSave.


That’s it! Now people in your account can use their company credentials to sign in to Smartsheet.
Configure additional IdPs
While most organizations only need a single active IdP, there’s no limit to the number of IdPs you can add.
To edit or add additional IdPs, next to theSAMLcheckbox, selectedit configuration. TheSAML Administrationform appears for you to add additional IdPs or edit existing ones you’ve already set up.
If you have more than one active IdP, people signing in via SAML will authenticate against the default IdP. To make an IdP the default, in theEdit IdPform, selectMake Default.

Direct people to sign in at a friendly CNAME URL
Smartsheet provides the default SSO URL for your organization, which is a one-step link to sign in to Smartsheet. You might want to add aCNAME友好的,更多的公司网址.
Don’t typesso.smartsheet.comin theCNAMEfield of theEdit IdPform, because that will cause login issues. Instead, use aCNAMEcreated by your company and have that point to sso.smartsheet.com.
- In your domain, create a CNAME DNS record and point it at sso.smartsheet.com. For example,smartsheet.example.org IN CNAME sso.smartsheet.com.
- In theEdit IdPform, enter theCNAME.
- SelectAdd.
It may take up to one hour for yourCNAMEaddress to authenticate.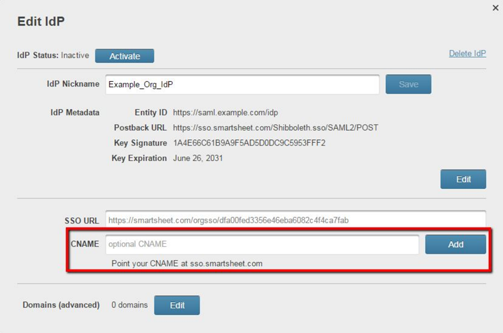

Removing a user’s SSO access alone isn’t enough to prevent them from accessing Smartsheet. To fully prevent a user from accessing Smartsheet, you must completelydelete that user from your organization’s Smartsheet account.
Different SAML configuration states
SAML will be in one of the following states:
- Not configured:There are no active IdPs.
- Disabled:There is at least one active IdP. Also, in theAuthenticationform, theSAMLcheckbox isn’t selected.
- Enabled:There is at least one active IdP. Also, in theAuthenticationform, theSAMLcheckbox is selected. Your IdP will be in one of three states:
- Not configured:Security certificate is expired
- Inactive:Valid metadata, valid security certificate
- Active:Valid metadata, valid security certificate, not sharing entity ID with another active IdP on your account, and activated