Smartsheet easily connects with the Microsoft Office 365 tools your teams use to make collaboration work and increase productivity.
Smartsheet for Outlook Add-in
The Smartsheet for Outlook add-in (formerly called the Smartsheet App for Outlook) allows you to create and edit Smartsheet tasks and collaborate on them in real-time, all without leaving your Outlook inbox. Add email messages and their attachments to rows or discussions in your sheet for all collaborators to see and act on.
After August 17, 2021 you will no longer be able to access Smartsheet or Smartsheet for Gov using Microsoft Internet Explorer 11 web browser.
Before You Begin
The Smartsheet for Outlook add-in works with Outlook when used in conjunction with a supported Microsoft account.
Make sure you're running the latest version of Outlook; it provides the needed browser support.
Supported versions of Outlook include:
- Outlook 2013 or later for Windows
- Outlook 2016 for Mac
- Outlook for iOS
- Outlook for Android
- Outlook on the Web
Supported account types include:
- Outlook.com accounts
- Office 365 Business
- Office 365 Business Platinum
- Office 365 Pro-Plus
- Office 365 Enterprise E1
- Office 365 Enterprise E3
- Office 365 Enterprise E5
Microsoft Exchange on-premises (locally hosted) systems aren’t supported.
Delegate access Outlook accounts are not supported. You may encounter errors when using this type of account with the Outlook Add-in for Smartsheet.
Install the Add-in and Connect Outlook to Smartsheet
To use the add-in, you'll first need to install it from the Microsoft Office Store (https://store.office.com) and connect it to your Smartsheet account. Once the add-in has been installed (either by you or an Admin on your Microsoft account), you’ll want to connect your Outlook account with your Smartsheet account.
NOTE: You'll only need to install the add-in fromonedevice. After installing it once, it will also be made available on any other device that you're signed in to.
Install the Add-In from a Computer
To install the Smartsheet for Outlook add-in from a computer:
- In the Office Store, navigate to theSmartsheet for Outlook add-inand click theAddbutton.
- When prompted, sign in with yoursupported Microsoft account. (This should be the email address that you’re using with Outlook.)
Install from iOS or Android
To install the Smartsheet for Outlook add-in from an iOS or Android device:
- In the Outlook for iOS or Outlook for Android app, selectSettings > Add-ins.
- Tap theplus iconfor Smartsheet.
Instructions on installing add-ins can also be found on the Microsoft support page onOutlook for Mobile devices.
Connect your Outlook and Smartsheet Accounts
To connect your Outlook account with your Smartsheet account:
- Navigate to Outlook on the Web (https://outlook.office365.com/) and open an email message sent to yoursupported Microsoft email address.
- Click the Smartsheet logo
 in the upper-right corner of the email message to open the Smartsheet add-in panel.
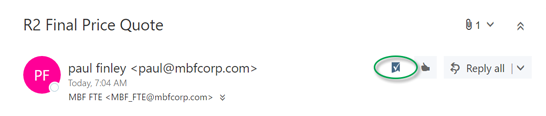
注意:如果您没有看到内容的标志upper-right corner of the email, make sure to open an email sent to yoursupported Microsoft email address.
The add-in panel appears on the right of the Outlook window, requesting permission to install Smartsheet for Outlook. - In the add in panel, selectInstallto provide permission to connect to your Smartsheet account.
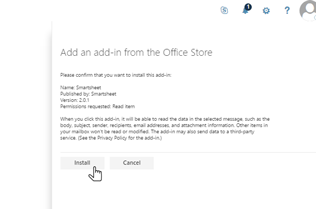
- In the add-in panel on the right of the Outlook window, selectConnect to Smartsheet.
- In the window that appears, log in to your Smartsheet account and clickAllow.


You’re done! After you’ve installed and connected it, the Smartsheet for Outlook add-in will display the Home directory from your Smartsheet account. The add-in will also be immediately available for you on any othercompatible version of Outlookthat you’re signed in to with yoursupported Microsoft account.
Use the Smartsheet for Outlook Add-In
Add email messages to new or existing rows in your sheet as you track work, all without leaving your Outlook inbox. Open sheets from Outlook to immediately see your sheet data in Smartsheet.
Access Smartsheet for Outlook from Multiple Versions of Outlook
Once you’ve installed the add-in, it will be available from any version of Outlook that you use with yoursupported Microsoft accountemail account. How you add email messages to sheets with the Smartsheet for Outlook add-in depends on theversion of Outlookyou’re using.
Smartsheet for Outlook on the Web
To access Smartsheet for Outlook on the Web:
- Open an email message sent to yoursupported Microsoft email address.
- To display the Smartsheet panel in Outlook, select the Smartsheet logo
 in the upper-right corner of the email.
Depending on the number of add-ins you have, you may need to select theAdd-ins caretin the email next to your other add-ins, then select Smartsheet.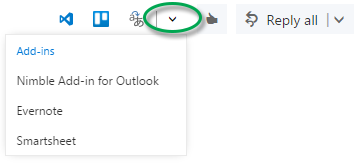
NOTE: If you don’t see the Smartsheet for Outlook add-in, it may need to beinstalled.
Smartsheet for Outlook 2013 or Newer (Outlook 2016 on Mac)
从前景桌面:访问插件ication:
- Open an email sent to yoursupported Microsoft email address.
- SelectAdd to Smartsheetin the upper-right corner of the Outlook window.

NOTE: If you don’t see the Smartsheet for Outlook add-in, it may need to beinstalled.

Smartsheet for Outlook on iOS and Android
To access the add-in from the Outlook application on iOS or Android:
- Tap to open an email sent to yoursupported Microsoft email address.
- Tap the Add-In icon
 , then tap
 Add to Smartsheet.
 - If you don’t see the Smartsheet for Outlook add-in, it may need to beinstalled.
Add Emails & Email Attachments to Rows
向新的或面临添加电子邮件及其附件g rows in Smartsheet:
By default, a new comment will be added to the row, using the message body of the email as the comment.
TIP: You can click the name of the sheet at the top of the add-in panel to open it up and work on it in Smartsheet. The sheet will open in a new browser tab.
To add email information to a sheet in Smartsheet:
- Open an email sent to yoursupported Microsoft email address.
- Select theSmartsheet iconin the Outlook window. This varies depending on theversion of Outlookyou’re using.
- In Outlook, use either of the following methods to locate and select the sheet to which you want to add the contents of the email:
- Type the name of the sheet in the search field at the top of the add-in panel.
- Navigate through your Smartsheet Home directory below the search field in the add-in panel.
- You have the following options for adding the contents of your email to a sheet:
- Add as new row—To add the email as a new row at the bottom of the sheet, select Add Row at the bottom of the add-in panel.
- Add to existing row—To add the email to an existing row in the sheet, select the row in the add-in panel.
The app updates to show you any existing data in the row's Primary Column. If you're adding a new row, the Primary Column will be populated with the subject of the email.
- ClickSaveon the bottom-right when finished. The changes will be applied to the sheet in Smartsheet immediately.
Keep the following in mind as you add email information to sheets:
- You can selectShow Moreto review the other columns in the sheet and edit them as needed.
- By default, a new comment will be added to the row, using the message body of the email as the comment. You can modify the comment however you see fit.
- If you'd like to have the email displayed in a column, rather than a comment,copy it out of the comment fieldand paste it into the appropriate field, then erase the information from the comment.
- Any email attachments will also be uploaded to the row by default. If you don't wish to include them, de-select the checkboxes next to the attachment names.
- You can click the name of the sheet at the top of the add-in panel to open it up and work on it in Smartsheet. The sheet will open in a new browser window.
Open Existing Sheets from Outlook
From Outlook, you can search through sheets accessible to your Smartsheet account and open them in a new browser window.
To open a sheet from Outlook:
- Open an email sent to thesupported Microsoftaccount that Smartsheet for Outlook is connected to.
- Select the Smartsheet icon in the Outlook window. This varies depending on the version of Outlook you’re using.
- In Outlook, use either of the following methods to locate and select the sheet you want to open:
- Type the name of the sheet in the search field at the top of the add-in panel.
- Navigate through your Smartsheet Home directory below the search field in the add-in panel.
- Select the sheet name at the top of the add-in panel. This will open the sheet in a new browser window.
Smartsheet Data that Can't be Edited from Outlook
Certain values can't be updated in your sheet from the Outlook Add-In and must be edited in your sheets directly:
- Any cell that contains a formula.
- Any finish date or duration value on sheets that have dependencies enabled. Note that youcanchange the start date and duration values to influence the end date. (SeeEnabling Dependencies and Using Predecessorsfor more information on the dependencies functionality.)
- Any Contact list column which allows multiple contacts per cell. (More on thishere.)
- Dropdown list columns with multi-select enabled
Troubleshoot the Smartsheet for Outlook Add-in
I installed the add-in but the Smartsheet icon doesn’t show up in my messages.
- The Smartsheet iconappears only on emails sent to yoursupported Microsoftemail address.
- When in Outlook for Web, depending on the number of add-ins you have, you may need to select the Add-ins caret in the email next to your other add-ins, then select Smartsheet.
How do I know if my Microsoft account is supported?
You can find out which Microsoft accounts are supportedhere.
How can I find out what version of Outlook I’m using?
You can check to see what version of Outlook you’re using in thisMicrosoft Supportarticle.